
Creating a job in Okappy from Freshdesks
Freshdesk is a customer support platform that provides the tools, integrations and resources you need to manage enquiries, tickets and customer communication efficiently.
You can connect Freshdesks to Okappy and automatically create jobs in Okappy when a ticket has been raised in Freshdesks.
See more about our integration features.
Read on to find out how to automatically create a new job in Okappy when a ticket has been raised in Freshdesks.
Use automations in Freshdesks to create a job
To create a job in Okappy, you can utilise a Freshdesk automation with a web hook.
Note: The availability of automations is dependant on your Freshdesk product and subscription.
To add a job in Okappy,
- Go to Admin in your Freshdesk and select Automations
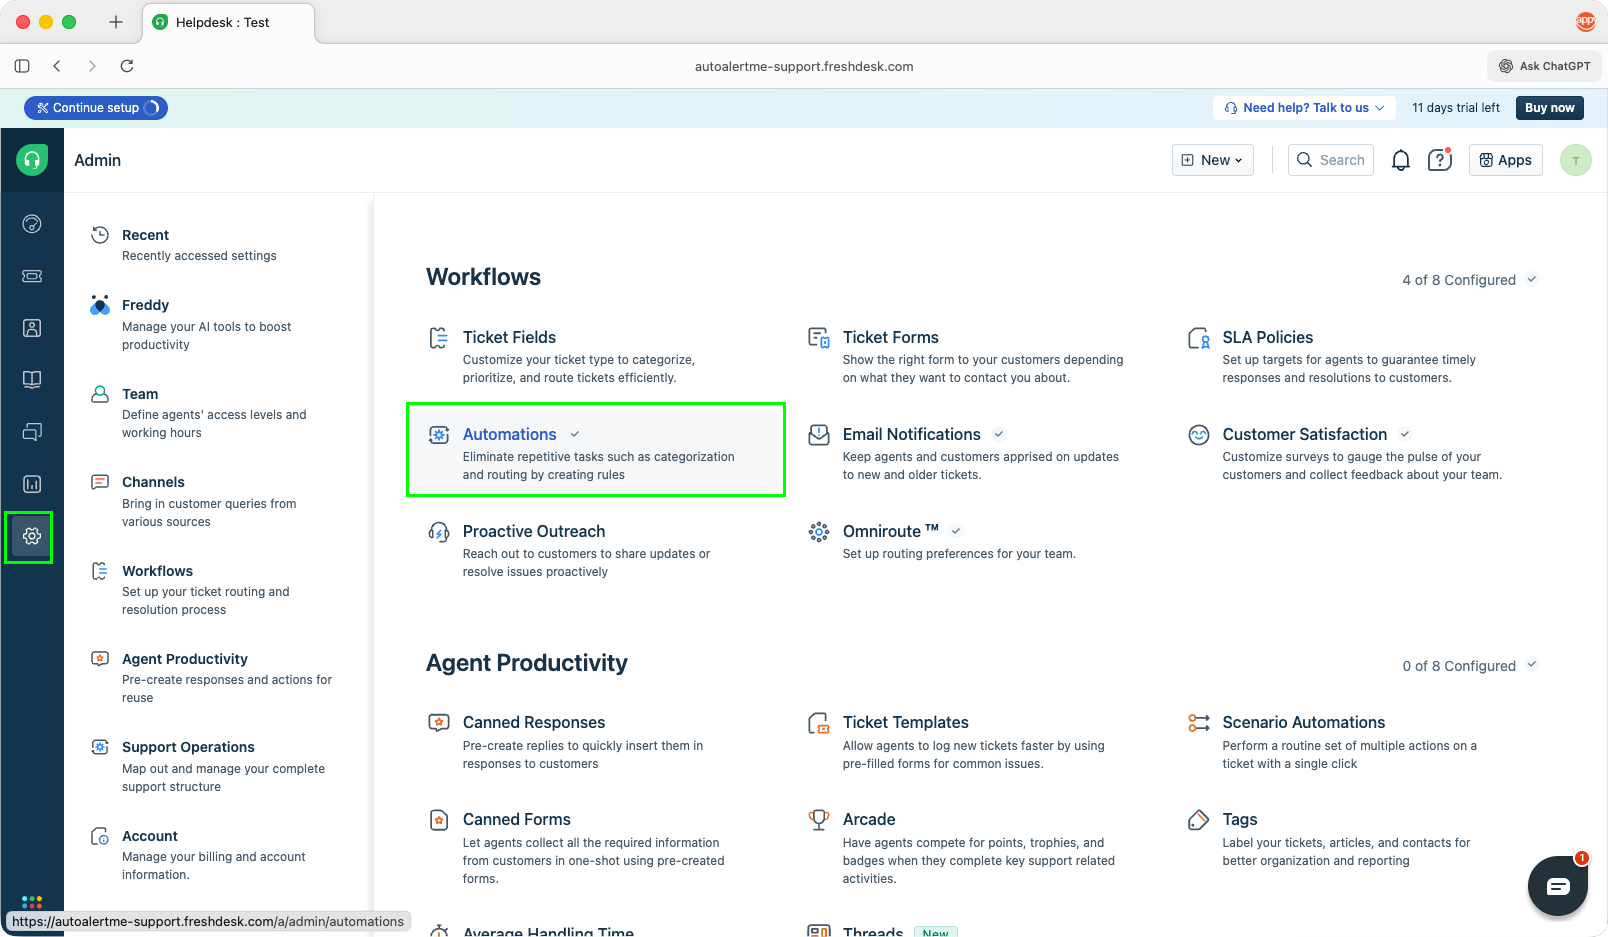
- Choose + New rule
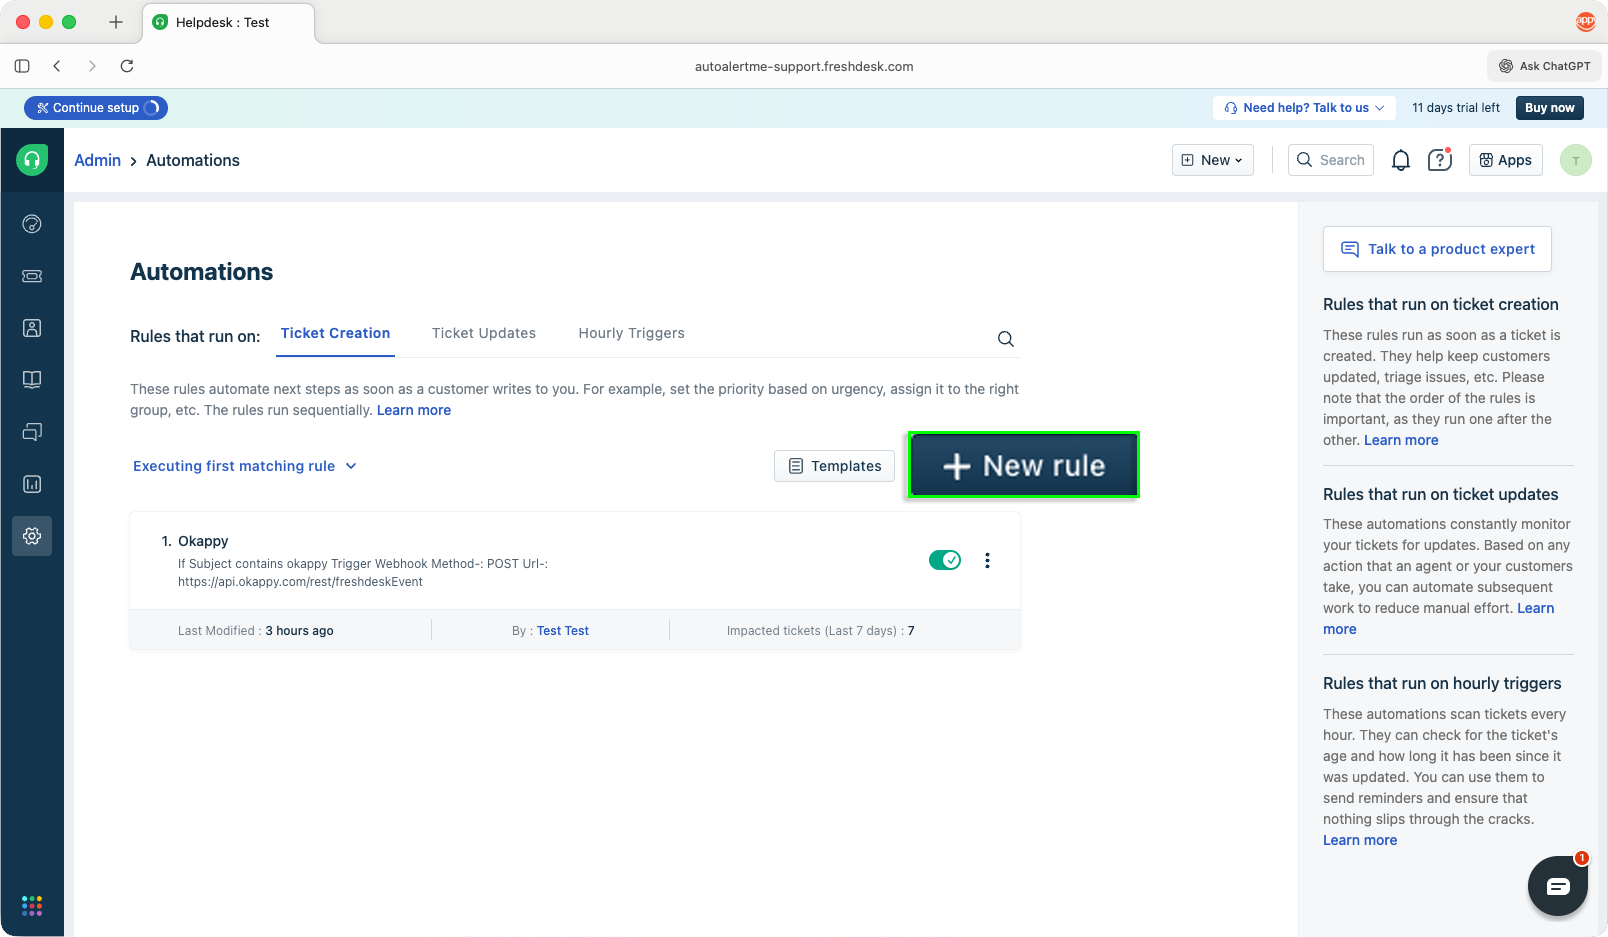
- Add a name for your automation and choose when you want the integration to fire i.e. when a ticket has been created
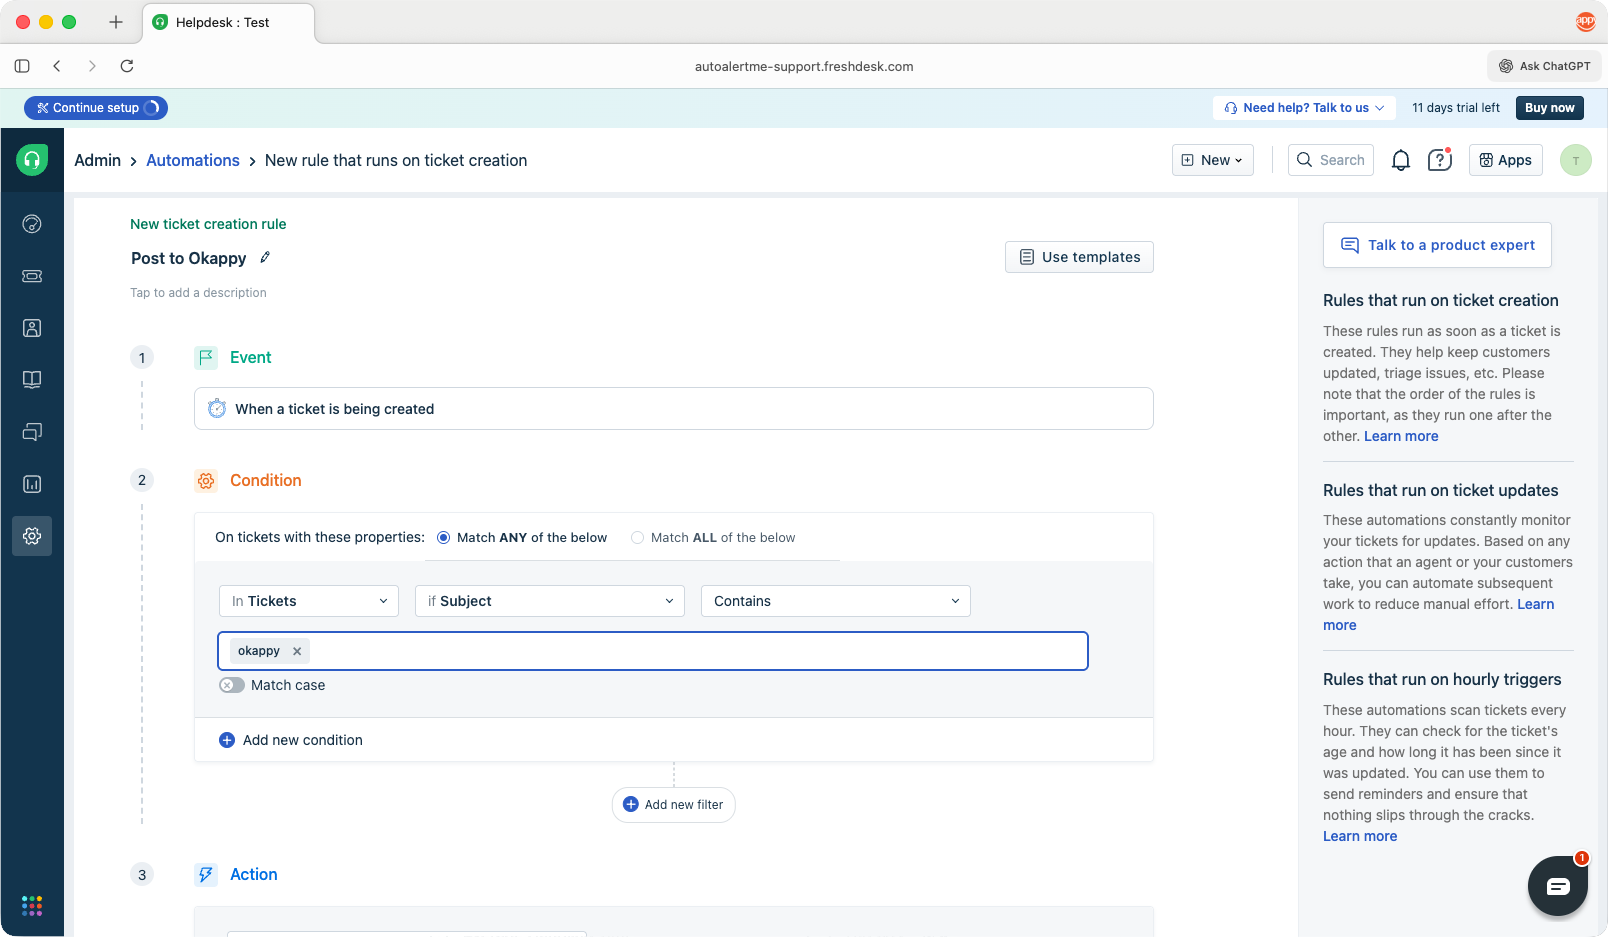
Note: Ensure the condition is set so that your automation runs. i.e., If you set Tickets subject is X, and the subject contains additional text then it won’t run.
- In Actions, choose Trigger Webhooks
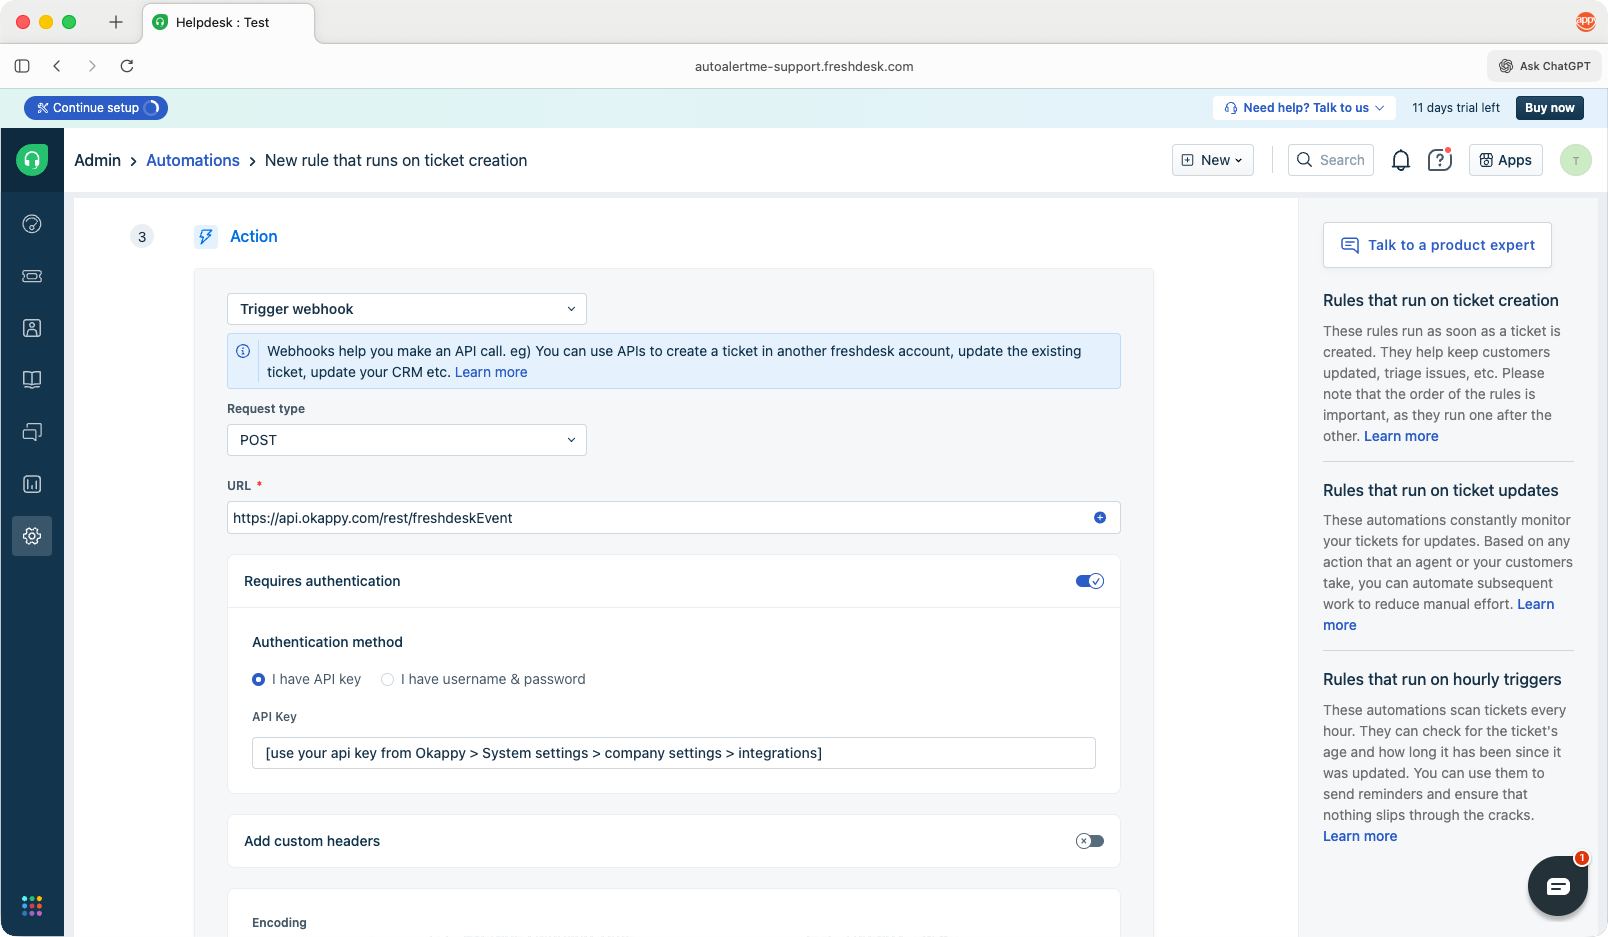
- Then fill out the following
- Request type, select POST
- Url, enter https://api.okappy.com/rest/freshdeskEvent
- Select Require authorization and choose Use API key
- Retrieve your API key from within Okappy > System settings > Company settings > Integration settings.
- Enter your Okappy API key into the API Key field
- In encoding, choose JSON and select placeholders from the ticket fields to be sent. These are the fields which will be sent to Okappy.
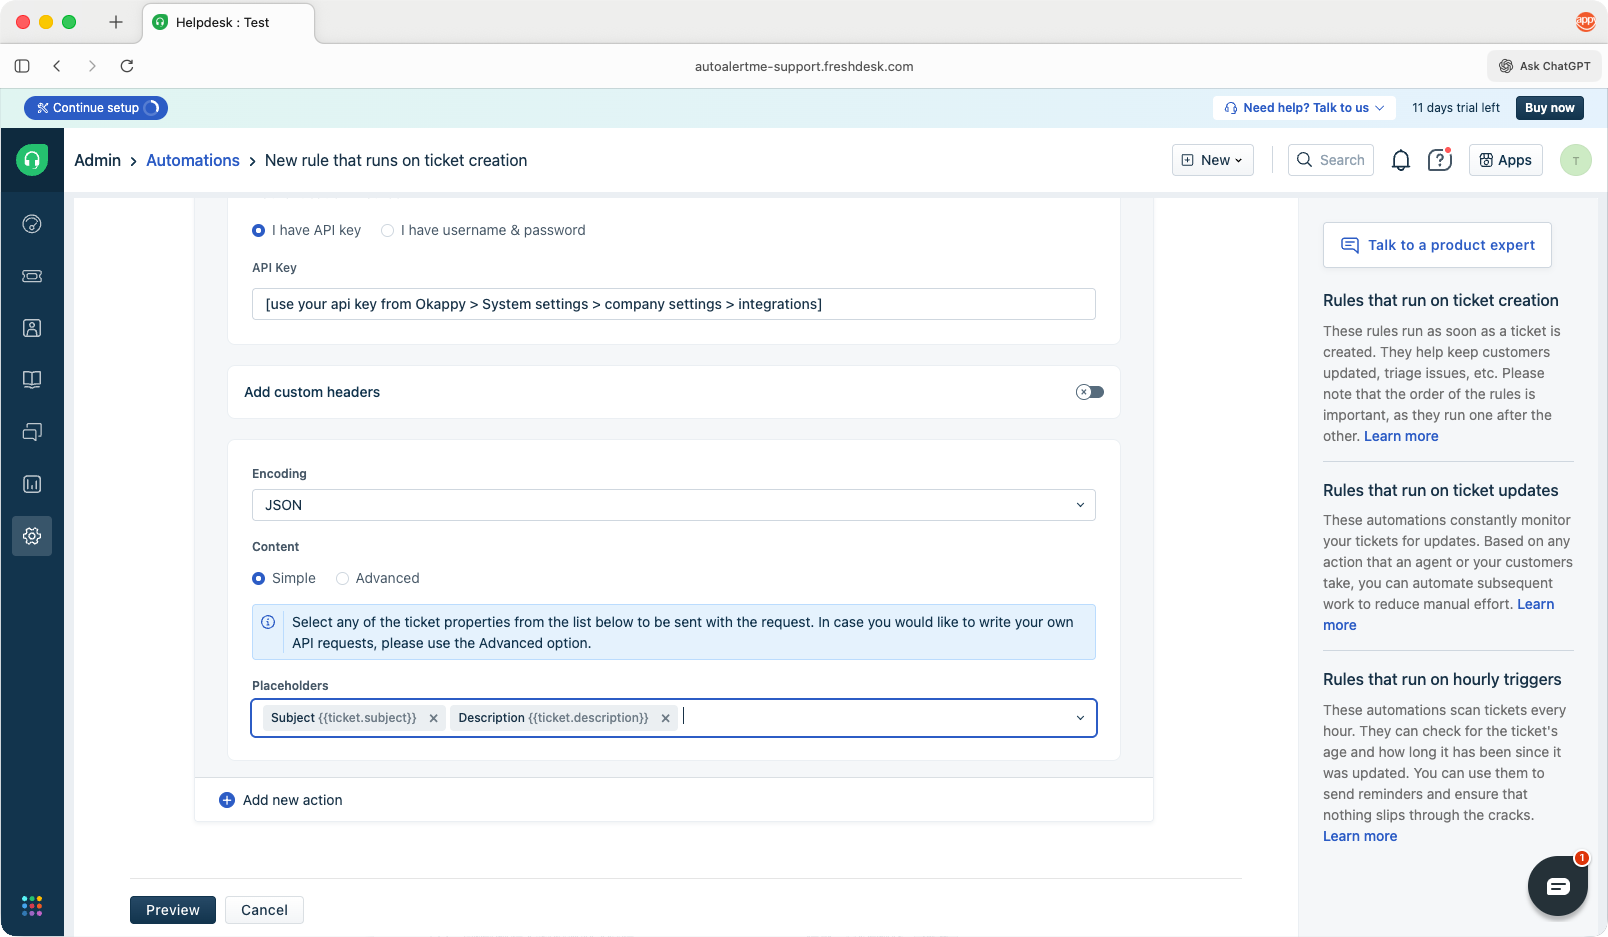
Notes:
- triggered_event is required in order for Okappy to see that the ticket has been created.
- If ticket_customer is provided, Okappy will use your client where an exact match client name is found. Otherwise the job will default to you.
- If ticket_ticket_type is provided, Okappy will look for an exact match in the job template names. Otherwise it will default to a standard template
- Click Preview and then Save and enable
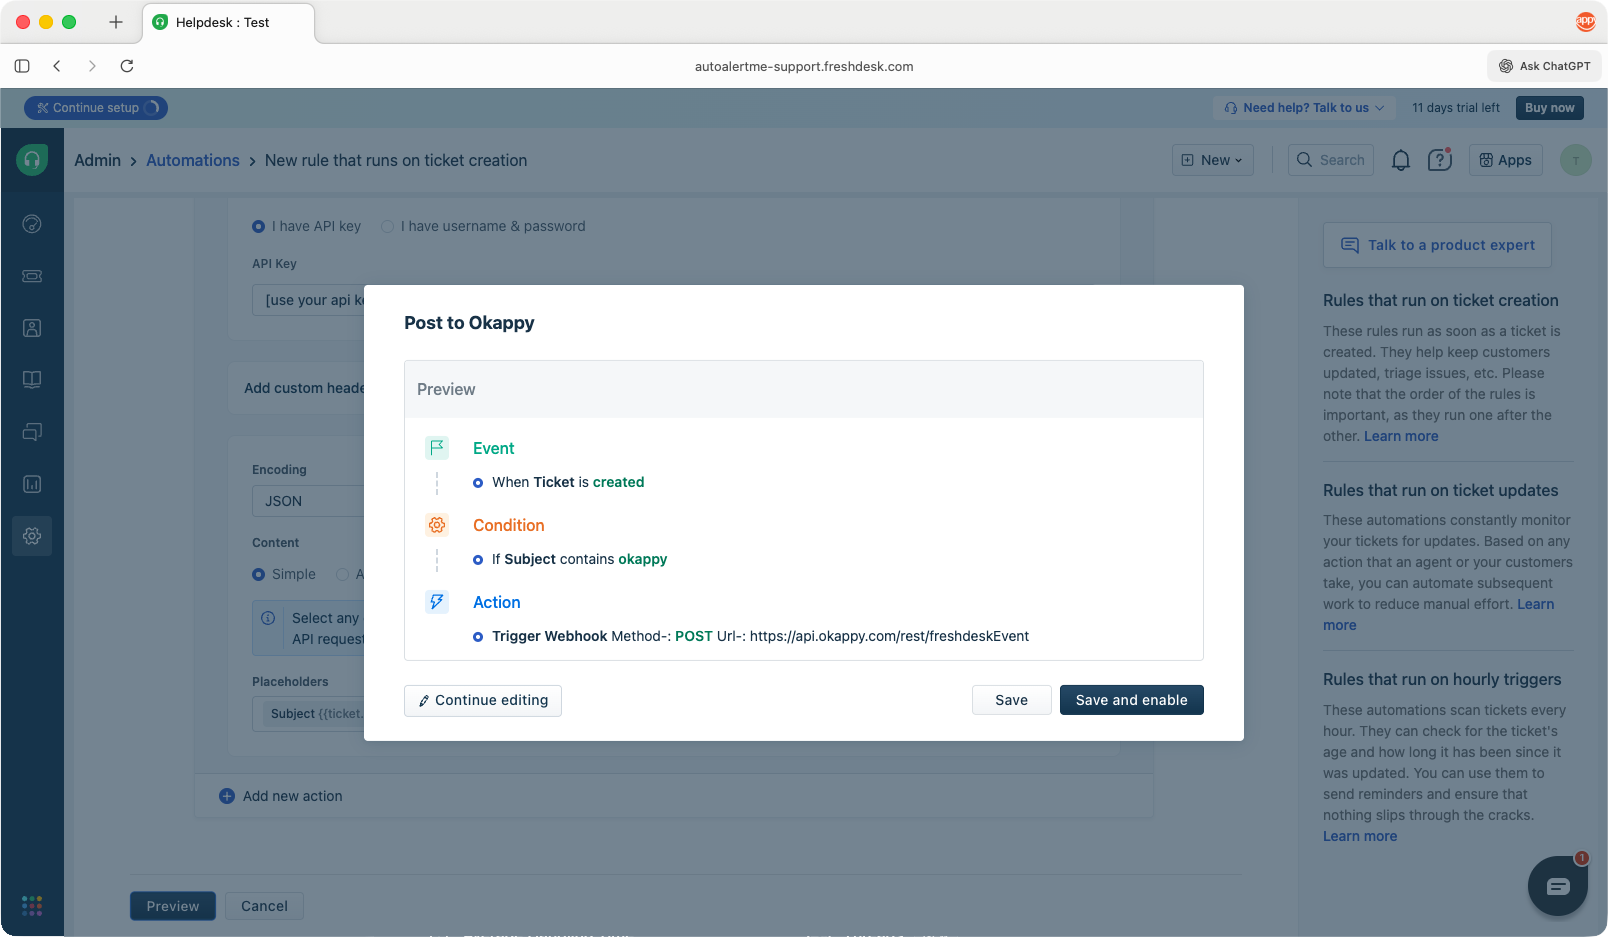
You should now be able to create a ticket and a job will be created in Okappy.
Freshdesk to Okappy mappings
| Freshdesk placeholder | Okappy field | Required | Notes |
|---|---|---|---|
| triggered_event | N/A | Y | Okappy looks for ticket_created. In this this field in order to determine whether to create a job |
| ticket.status | Status | N | By default, Freshdesk provides the following statuses – Open, Pending, Resolved, Closed, Waiting on Customer. To pick up these statuses in Okappy, you’ll need to include them in the job template > job options > Job status |
| ticket.company_name | Customer | N | If this is present, Okappy will search your list of customers for a match.
Note: The match has to be exact (spelling, capitalisation, spacing) otherwise the job will default to you as the customer |
| ticket.ticket_type | Job type | N | If this is present, Okappy will search your list of job templates for a match.
Notes:
|
| ticket.subject | CustomerReference | N | Maximum 30 characters |
| ticket.description | Description | N | Text max size approx. 64k |
| ticket.priority | Priority | N | Maximum 20 characters |
| ticket.source | Column1 | N | Maximum 100 characters |
| ticket.status | Column2 | N | Maximum 100 characters |
| ticket.product_description | Column3 | N | Maximum 100 characters |
| ticket.cf_reference_number | Column4 | N | Maximum 100 characters |
| ticket.tags | Column5 | N | Text max size approx. 64k |
Note: Other Freshdesks fields can be included, but will not get picked up by Okappy.
Troubleshooting
| Issue | Check |
|---|---|
| A job is not created in Okappy |
|
| The job is created but information is missing |
|
| The job is created but it uses the standard template |
|
| The job is created but the customer defaults to your account |
|
| Information shows in the job in Okappy but some text is truncated |
|
| The job is created but it has the wrong status |
|